Preface#
I actually did this content a year ago, (previously written), and after setting it up, I also let my friends use it. I found in practice that having users install the client themselves or adding the client as a service is quite troublesome for users; there is still a certain threshold, and it's not very convenient. Recently, while browsing Interesting Open Source Community - HelloGitHub, I discovered a pretty good frp client project—luckjiawei/frpc-desktop: frp cross-platform desktop client, visual configuration, easily achieve internal network penetration! Supports all frp versions. I took a quick look, the interface is quite nice, and the operation is not complicated, OK, it's you.
Server Installation#
Preparation#
This setup requires two open-source projects:
- luckjiawei/frpc-desktop: frp cross-platform desktop client, visual configuration, easily achieve internal network penetration! Supports all frp versions

- fatedier/frp: A fast reverse proxy to help you expose a local server behind a NAT or firewall to the internet.

The files to be downloaded are as follows:
3. frp server

4. frp client

Install frp Server#
- Connect to the server and upload the server files. I used Xftp 8 and Xshell 8 to connect to the server.

- Switch to the corresponding path and unzip the files
cd /home/frp
tar -zxvf frp_0.64.0_linux_amd64.tar.gz
After unzipping, rename the folder for easier path input later. The frps.toml is the server's configuration file, and frps is the server binary program.

- Modify the configuration file
vim frps.toml

Press i to start typing, ESC then type to exit editing.
bindPort = 7000 # Server port
auth.method = "token" # Use token for authentication
auth.token = "[email protected]" # Token, must match between client and server for successful connection. Recommended to configure it to be more complex.
- Start the server
./frps -c ./frps.toml

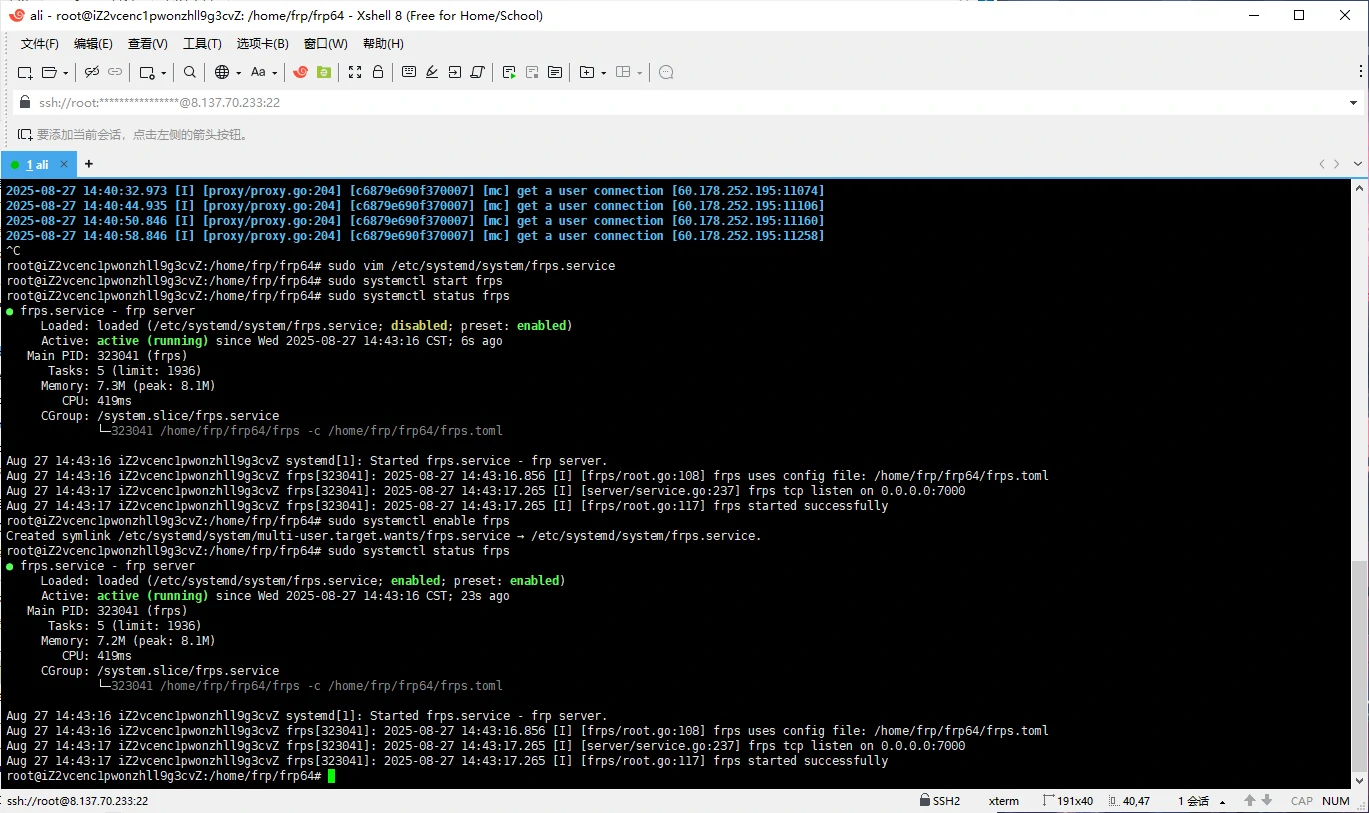
- Add frp as a service and enable it to start on boot
- Press CTRL+C to interrupt the process
- Create frps.service file
sudo vim /etc/systemd/system/frps.service - Write the content

[Unit]
# Service name, customizable
Description = frp server
After = network.target syslog.target
Wants = network.target

[Service]
Type = simple
# Command to start frps, must change to your frps installation path
ExecStart = /path/to/frps -c /path/to/frps.toml

[Install]
WantedBy = multi-user.target
4. Start frp and set it to start on boot
# Start frp
sudo systemctl start frps
# Stop frp
sudo systemctl stop frps
# Restart frp
sudo systemctl restart frps
# Check frp status
sudo systemctl status frps
Set frps to start on boot
sudo systemctl enable frps
When you see both enabled and active (running), it means it is running normally.
Enable Firewall#
I am using Alibaba Cloud server, go to Alibaba's console to enable the firewall. Here, you need to open port 7000 and the target port you need to map. I opened all ports from 50000 to 60000.


Install frp Client#
The installation of the client on Windows is quite convenient; just keep clicking next.
After installation, you need to connect to the server.
- Download the corresponding frp version in the settings. My server uses 0.64.0, so I am using 0.64.0 here as well. If the language is not Chinese, you can switch the language at the bottom.


- Enter the server address, port, select token for authentication, and then input the token set earlier.

- Set up the tunnel
Choose the proxy type you need, the internal address, and the ports on both sides. I will continue to use mc as an example.

- After setting up, start frp to use it.

The final effect is as follows#


Reference tutorials are as follows#
- Easily master popular internal network penetration tools: quickly achieve external access to internal services
- Installation | frp
Conclusion#
The frp set up on this server can be used for free by everyone, and the server will expire in January next year.
Address: 8.137.70.233
Port: 7000
Key: [email protected]